

Setting a Default Style
- iOS
- macOS
1
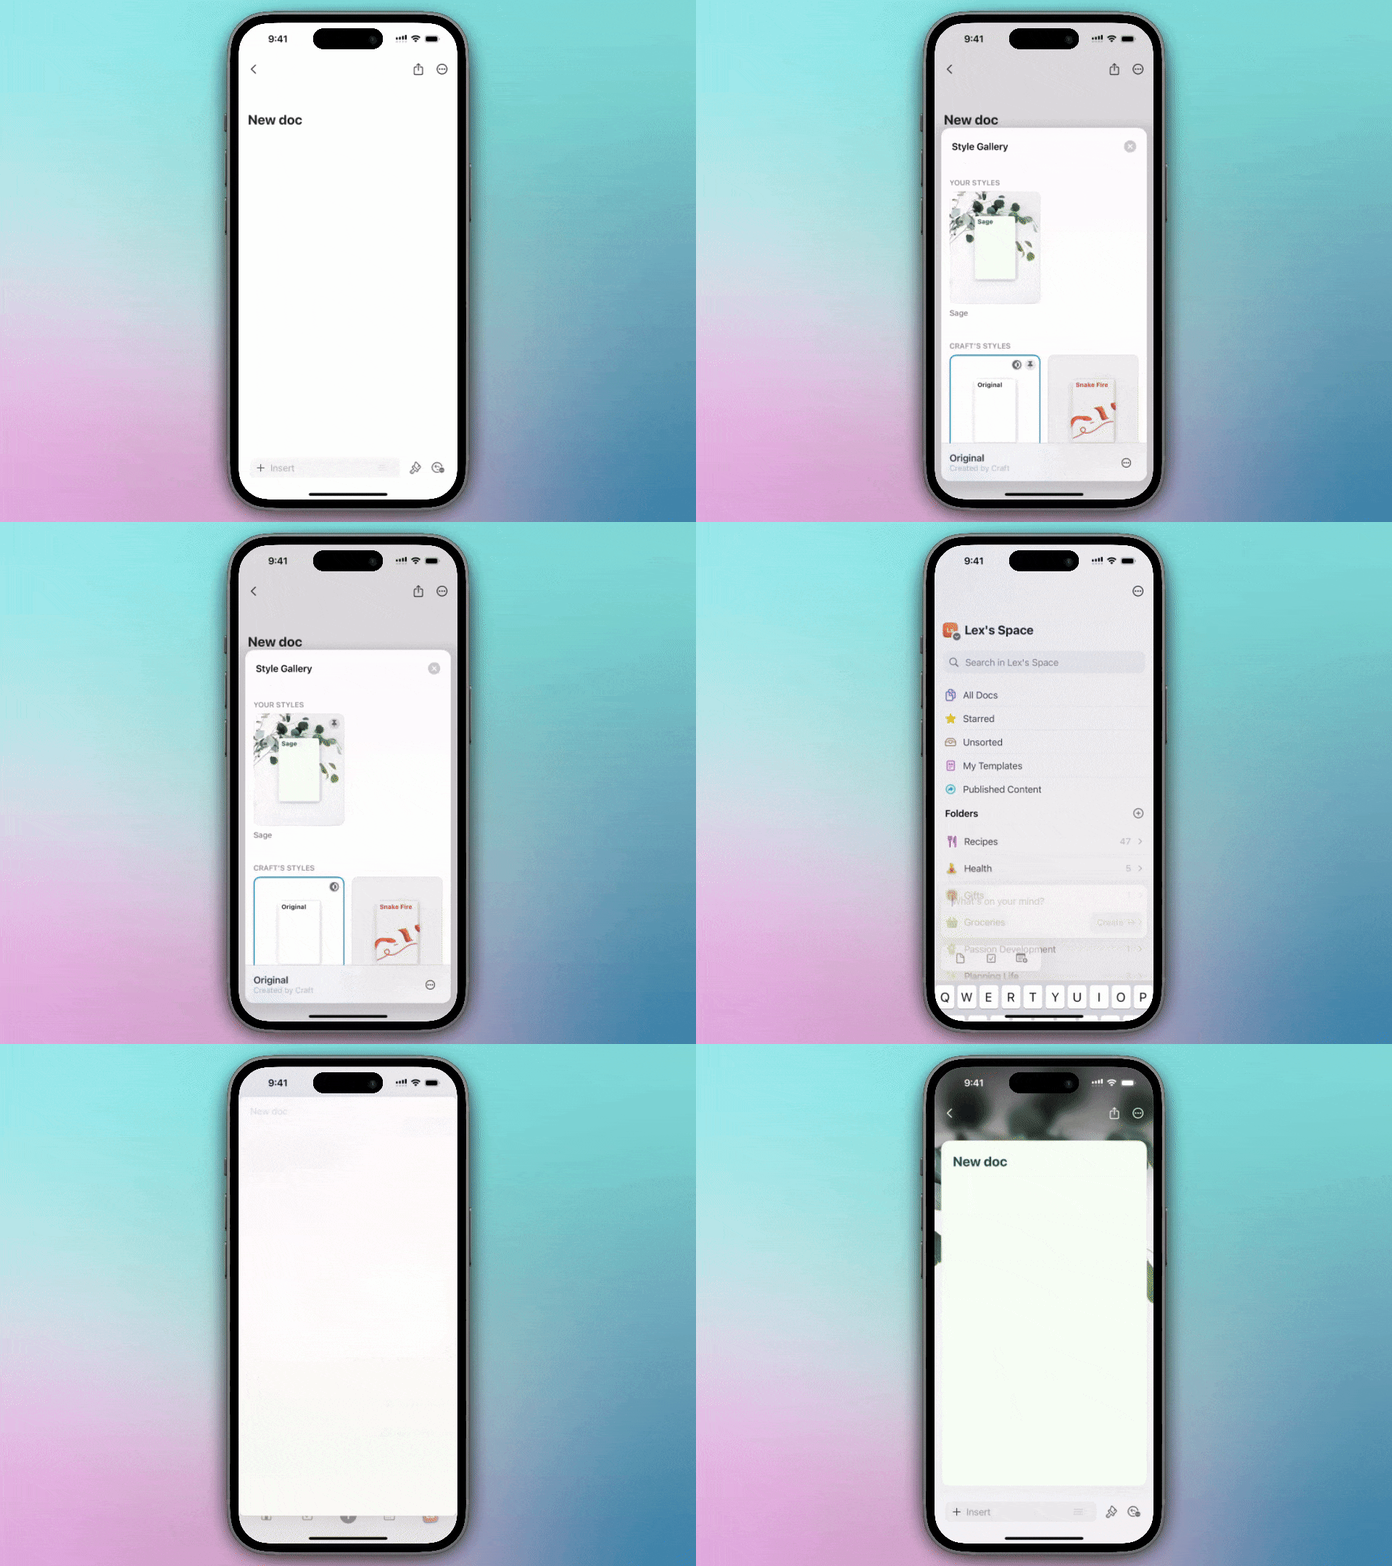
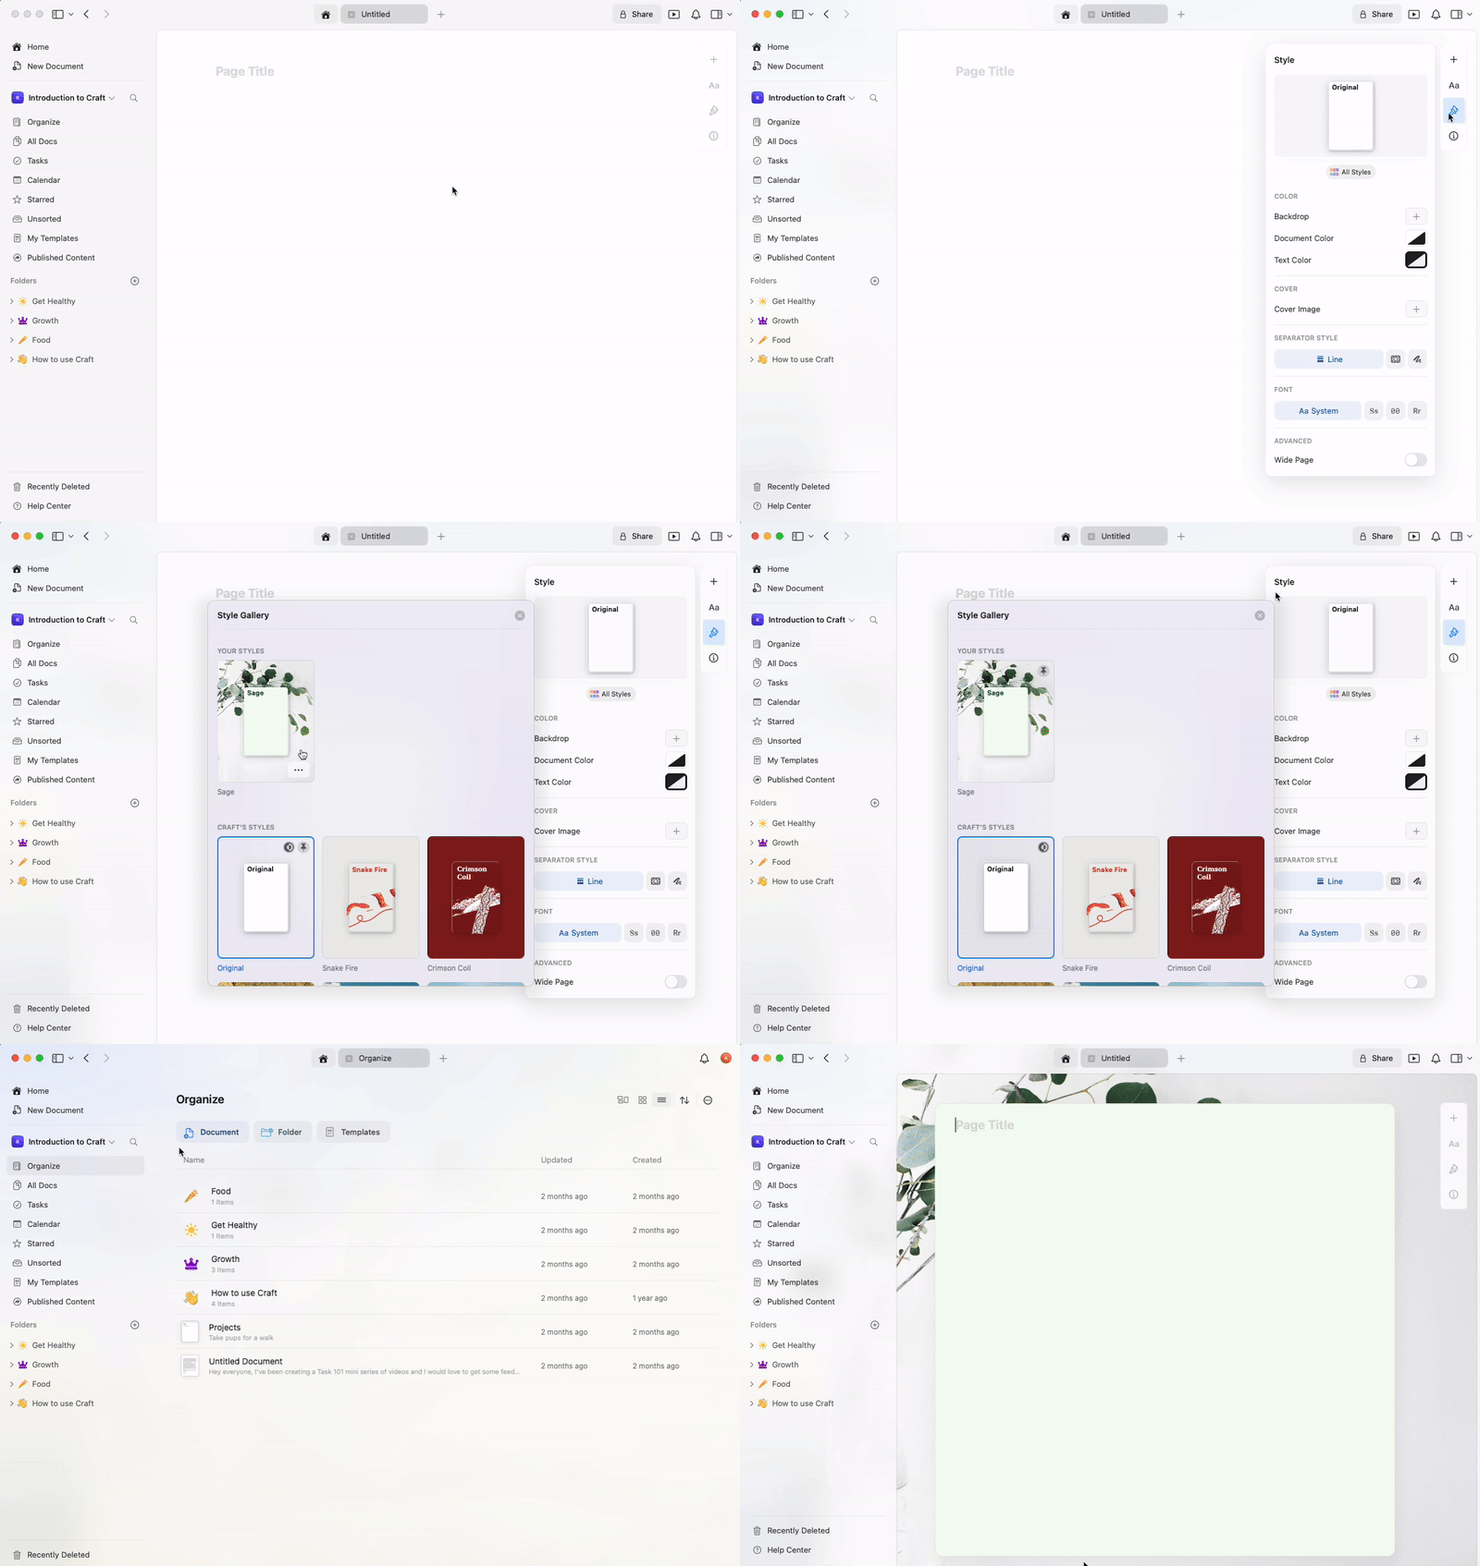
Create a new document or open an existing one
2
Select the paintbrush icon toward the bottom-right of your screen
3
Select the Styles tile
4
Long press on a page style you like, or create your own custom style
5
If creating a custom style, tap Save before setting it as default
6
Long press again and select Set as Default Style
What Gets Saved as Default
Your default page style includes:- Font - System, Serif, Mono, or Rounded
- Text color - Custom colors or system default
- Document color - Background color
- Cover image - If you’ve added one
- Backdrop - Solid color, gradient, or image
You can set your preferred text font in the Style tab of the right sidebar, then save it as your default. Each new document will automatically use your chosen font.
Creating Custom Styles
Before setting a default, you can create a fully customized style:1
Open the Styles menu from the sidebar
2
Customize your font, colors, backdrop, and cover image
3
Save your custom style
4
Set it as your default
Managing Default Styles
- Change default: Follow the same steps with a different style to replace your current default
- Reset to system: Choose the system default style and set it as your default
- Per-document override: You can always change the style of individual documents without affecting your default
Use Cases
Setting a default style is particularly useful for:- Consistent branding - Keep all your documents visually aligned
- Personal preference - Use your favorite font and colors automatically
- Project templates - Create different defaults for different workspaces
- Professional appearance - Ensure all documents have a polished look
Related Articles
Styles Quick Guide
Comprehensive guide to all styling features
App Styles
Extend document styles to the app interface
Cover Images
Customize cover images for your documents