> ## Documentation Index
> Fetch the complete documentation index at: https://craft-support.mintlify.site/llms.txt
> Use this file to discover all available pages before exploring further.
# 브랜딩
> 게시된 페이지에 로고를 표시하여 독자에게 전문적이고 브랜드화된 경험을 제공하세요.
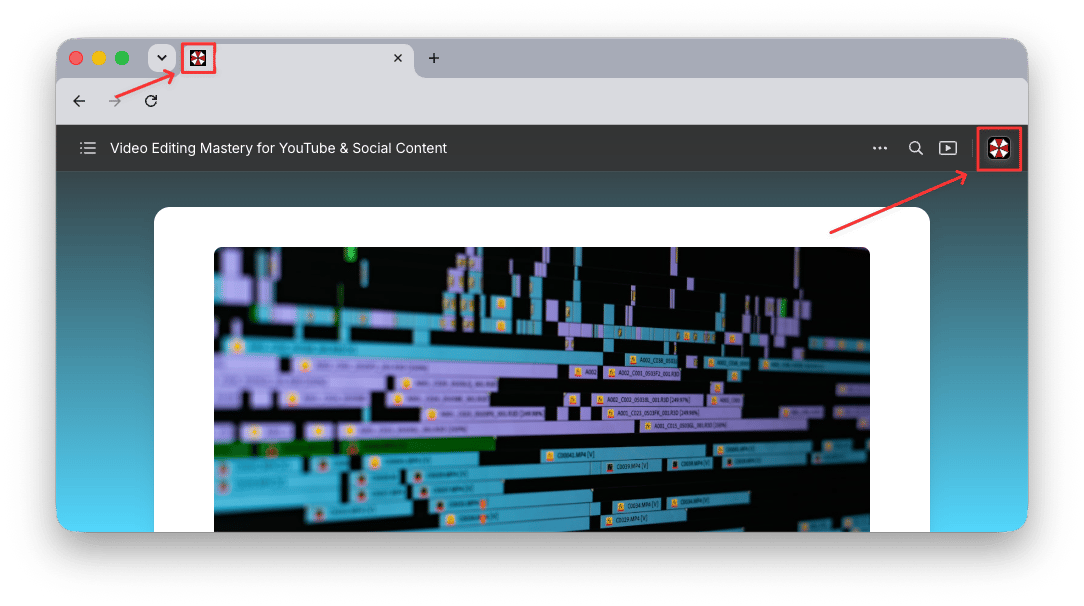
게시된 Craft 문서에 브랜드 정체성을 반영하세요. 로고는 모든 게시된 페이지의 페이지 헤더와 브라우저 탭 모두에 표시될 수 있습니다.
커스텀 브랜딩 기능은 **Plus, Family, Team, Business** 플랜에서 사용할 수 있습니다.
## 게시된 페이지의 로고
활성화하면 로고가 모든 게시된 문서의 **오른쪽 상단 모서리**와 **브라우저 탭 파비콘**으로 표시됩니다. 독자는 로고를 클릭하여 원하는 URL(예: 웹사이트)을 방문할 수 있습니다.
 ## 로고 활성화
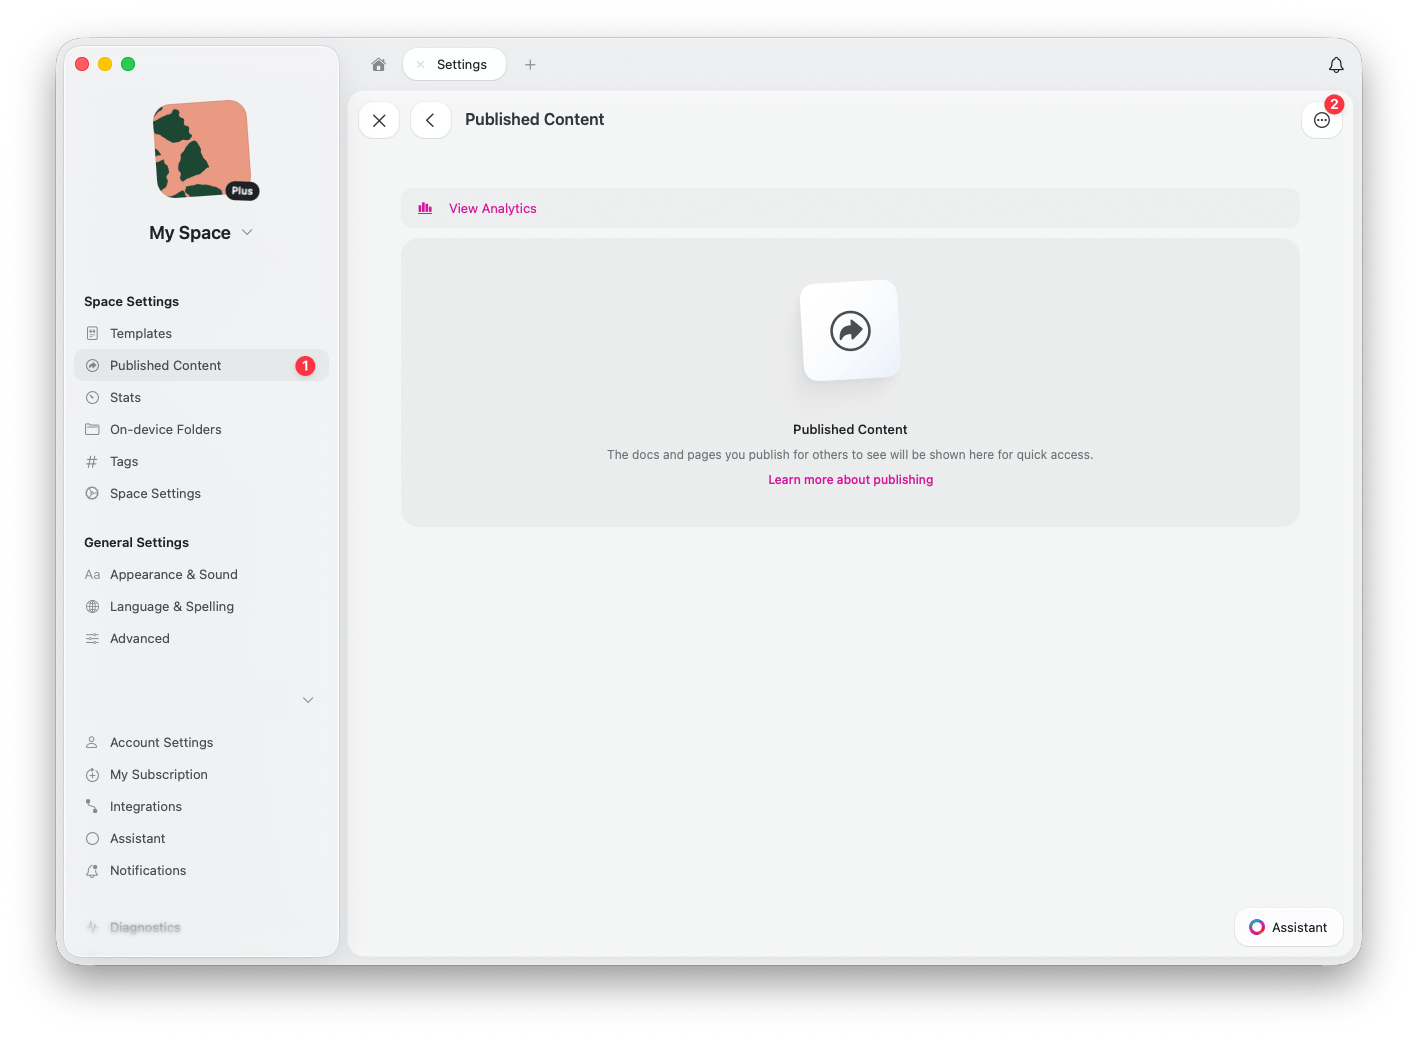
Craft 웹 또는 데스크탑 앱에서 **Space Settings** > **Published Content**로 이동하세요
설정 아이콘을 클릭하여 **Published Content Settings**에 접근하세요
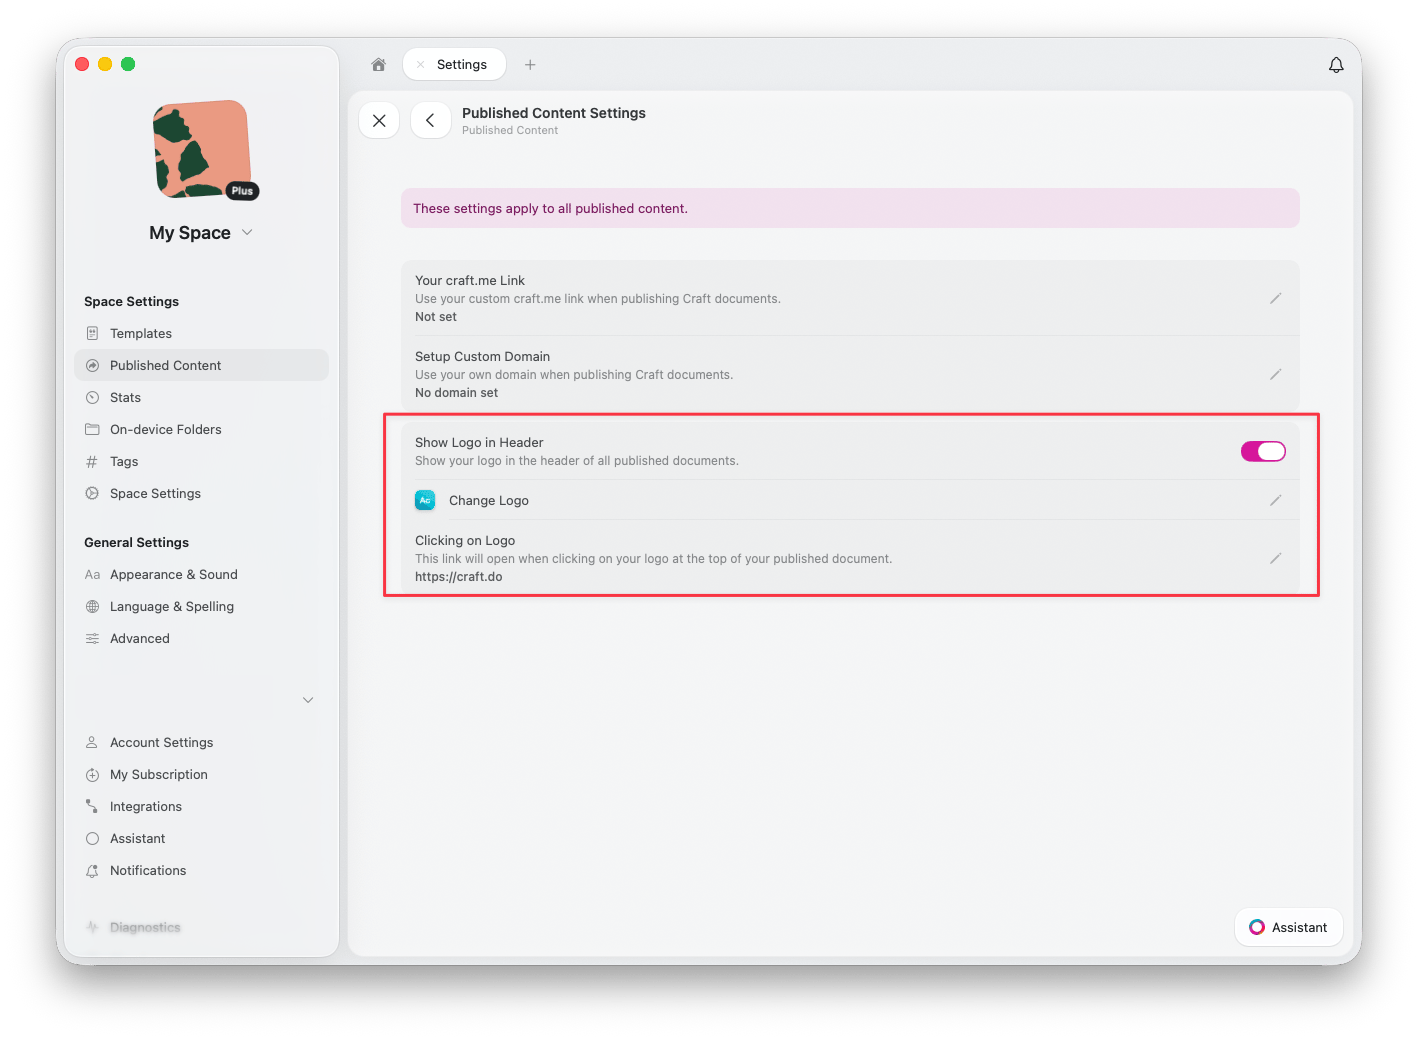
**Show Logo in Header**를 활성화하여 모든 게시된 문서의 헤더에 로고를 표시하세요
**Change Logo**를 클릭하여 게시된 페이지에 표시될 로고를 업로드하거나 업데이트하세요
**Clicking on Logo** 아래에서 독자가 로고를 클릭할 때 열릴 URL(예: 웹사이트 홈페이지)을 설정하세요
## 로고 활성화
Craft 웹 또는 데스크탑 앱에서 **Space Settings** > **Published Content**로 이동하세요
설정 아이콘을 클릭하여 **Published Content Settings**에 접근하세요
**Show Logo in Header**를 활성화하여 모든 게시된 문서의 헤더에 로고를 표시하세요
**Change Logo**를 클릭하여 게시된 페이지에 표시될 로고를 업로드하거나 업데이트하세요
**Clicking on Logo** 아래에서 독자가 로고를 클릭할 때 열릴 URL(예: 웹사이트 홈페이지)을 설정하세요
 ## 통합 브랜딩 기능
커스텀 브랜딩은 다른 게시 기능과 함께 작동하여 완전한 브랜드 경험을 만들어 냅니다:
**커스텀 도메인** -- `craft.me` 대신 자체 도메인(예: `blog.yourcompany.com`)을 사용하세요
**로고** -- 모든 게시된 페이지에 로고를 표시하세요
**커스텀 craft.me 링크** -- 브랜드에 맞게 craft.me URL을 개인화하세요
이러한 기능들을 함께 사용하면 Craft의 강력한 문서 기능을 활용하면서도 브랜드의 일부처럼 자연스럽게 보이는 전문적인 콘텐츠를 게시할 수 있습니다.
***
게시된 콘텐츠에 자체 도메인을 연결하세요
웹에 문서를 게시하는 방법을 알아보세요
## 통합 브랜딩 기능
커스텀 브랜딩은 다른 게시 기능과 함께 작동하여 완전한 브랜드 경험을 만들어 냅니다:
**커스텀 도메인** -- `craft.me` 대신 자체 도메인(예: `blog.yourcompany.com`)을 사용하세요
**로고** -- 모든 게시된 페이지에 로고를 표시하세요
**커스텀 craft.me 링크** -- 브랜드에 맞게 craft.me URL을 개인화하세요
이러한 기능들을 함께 사용하면 Craft의 강력한 문서 기능을 활용하면서도 브랜드의 일부처럼 자연스럽게 보이는 전문적인 콘텐츠를 게시할 수 있습니다.
***
게시된 콘텐츠에 자체 도메인을 연결하세요
웹에 문서를 게시하는 방법을 알아보세요